Saturday, November 12, 2011
Thursday, November 10, 2011
Thanksgiving Side Dish: Gluten-Free Stuffing

Stuffing has always been high on my list of favorite Thanksgiving dishes. This year I wanted to play around with gluten-free dishes based on whole grains that could go inside a bird but also stand alone. So I looked in my pantry and pulled out all the half-full bags of the different colorful types of grains that I’ve been working with lately. First I combined them in visually pleasing ways, and then I decided what else I’d put into each stuffing (or pilaf, which is what these dishes really are).
What is it that I love about stuffing? For me, the identifying ingredients are quite simple — celery, onion and sage. I’ve never cared for meaty stuffings, but I’ve always liked traditional bread dressings, even when the bread came from a bag. Why? Because of the sage, celery and often thyme that went along with it. I’ve used celery, onion and sage in all five of this week’s whole-grain combos, and thyme in several. There’s a lot going on here when it comes to texture, and some sweet and savory contrasts. They’ll be welcomed by the gluten-intolerant and the vegetarians at your table — but I bet the bread and sausage eaters will like them too.
Wild Rice and Brown Rice Stuffing With Apples, Pecans and Cranberries
Like many Thanksgiving dishes, this pilaf combines sweet and savory foods. Apples and cranberries are high in phenolic acids, which are believed to have antioxidant properties.
1 1/2 cups wild rice
3/4 cup short-grain brown rice
6 cups chicken stock, vegetable stock or water
Salt to taste
1 tablespoon extra virgin olive oil
1 small or medium onion, finely chopped
1 cup diced celery
2 garlic cloves, minced (optional)
1 tablespoon butter
2 apples, cored and cut in 1/2-inch dice
1/3 cup lightly toasted pecans, coarsely chopped
2 tablespoons finely chopped fresh sage
1/3 cup dried cranberries
1. Combine the wild rice with 4 1/2 cups stock or water in one saucepan and the brown rice with 1 1/2 cups stock or water in another smaller saucepan. Add salt to taste and bring to a boil. Reduce the heat, cover and simmer the brown rice for 35 to 40 minutes, until the rice is tender and all of the liquid has been absorbed. Turn off the heat, place a clean kitchen towel over the pot and return the lid. Let sit for 10 to 15 minutes. Simmer the wild rice for 40 to 50 minutes, until the grains have begun to splay. Drain through a strainer if there is liquid in the pot, and return to the pot. Place a clean kitchen towel over the pot and return the lid. Let sit for 10 to 15 minutes.
2. While the grains are cooking, prepare the remaining ingredients. Heat the oil over medium heat in a large, heavy skillet and add the onion. Cook, stirring often, until the onion begins to soften, about 3 minutes. Add the celery and a generous pinch of salt, and continue to cook until the onion is completely tender, another 3 to 4 minutes. Stir in the garlic and cook, stirring, until it is fragrant, another 30 to 60 seconds. Remove from the heat and transfer to a large bowl. Add the cooked grains and stir together.
3. Return the skillet to the stove and heat over medium-high heat. Add the butter, and when the foam subsides add the apples. Cook, stirring or tossing in the pan, until lightly colored, about 5 minutes. Remove from the heat and add to the bowl with the grains. Add the remaining ingredients and stir together. Season to taste with salt and pepper. Transfer to a lightly oiled or buttered baking dish and cover with foil.
4. Warm the stuffing in a 325-degree oven for 20 to 30 minutes before serving.
Yield: Makes about 8 cups, serving 12 to 16.
Advance preparation: The cooked grains will keep for 3 days in the refrigerator and can be frozen. The stuffing benefits from being made a day ahead.
Nutritional information per serving (12 servings): 188 calories; 1 gram saturated fat; 1 gram polyunsaturated fat; 2 grams monounsaturated fat; 3 milligrams cholesterol; 33 grams carbohydrates; 3 grams dietary fiber; 21 milligrams sodium (does not include salt to taste); 4 grams protein.
Thursday, October 27, 2011
Triticum Fever, by Dr. William Davis, author of Wheat Belly
By William Davis at 2:10 pm Wednesday, Oct 26
Quick: Name a common food, consumed every day by most people, that:
• Increases overall calorie consumption by 400 calories per day
• Affects the human brain in much the same way as morphine
• Has a greater impact on blood sugar levels than a candy bar
• Is consumed at the rate of 133 pounds per person per year
• Has been associated with increased Type 1 Diabetes
• Increases both insulin resistance and leptin resistance, conditions that lead to obesity
• Is the only common food with its own mortality rate
If you guessed sugar or high-fructose corn syrup, you're on the right track, but, no, that's not the correct answer.
The true culprit: Triticum aestivum, or modern wheat.
Note that I said "modern" wheat, because I would argue that what we are being sold today in the form of whole grain bread, raisin bagels, blueberry muffins, pizza, ciabatta, bruschetta, and so on is not the same grain our grandparents grew up on. It's not even close.
Modern wheat is the altered offspring of thousands of genetic manipulations, crude and sometimes bizarre techniques that pre-date the age of genetic modification. The result: a high-yield, 2-foot tall "semi-dwarf" plant that no more resembles the wheat consumed by our ancestors than a chimpanzee (which shares 99% of the same genes that we do) resembles a human. I trust that you can tell the difference that 1% makes.
The obvious outward differences are accompanied by biochemical differences. The gluten proteins in modern wheat, for instance, differ from the gluten proteins found in wheat as recently as 1960. This likely explains why the incidence of celiac disease, the devastating intestinal condition caused by gluten, has quadrupled in the past 40 years. Furthermore, a whole range of inflammatory diseases, from rheumatoid arthritis to inflammatory bowel disease, are also on the rise. Humans haven't changed -- but the wheat we consume has changed considerably.
Wheat Bellies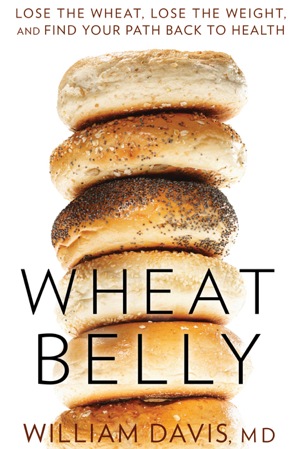 You've heard of "beer bellies," the protuberant, sagging abdomen of someone who drinks beer to excess. That distinctive look is often attributed to alcohol consumption when in fact it's just as likely to be caused by the pretzels -- not just the beer -- you're downing after work. A wheat belly is a protuberant, sagging abdomen that develops when you overindulge in wheat products like crackers, breads, waffles, pancakes, breakfast cereals and pasta. Dimpled or smooth, hairy or hairless, tense or flaccid, wheat bellies come in as many shapes, colors, and sizes as there are humans. But millions of Americans have a wheat belly, and the underlying metabolic reasons for having one are all the same. Wheat contains a type of sugar calledamylopectin A that raises blood sugar in an extravagant fashion. Eating just two slices of whole wheat bread, can raise blood sugar more than two tablespoons of pure sugar. This leads to the accumulation of visceral fat on the body, the deep fat encircling organs that is a hotbed of inflammatory activity. Inflammation, in turn, leads to hypertension, heart disease, cancer, and other conditions.
Wheat-consuming people are fatter than those who don't eat wheat. Why? Among the changes introduced into this plant is a re-engineered form of the gliadin protein unique to wheat. Gliadin has been increased in quantity and changed in structure, such that it serves as a powerful appetite stimulant. When you eat wheat, you want more wheat and in fact want more of everything else -- to the tune of 400 more calories per day. That's the equivalent of 41.7 pounds per year, an overwhelming potential weight gain that accumulates inexorably despite people's efforts to exercise longer and curtail other foods -- all the while blaming themselves for their lack of discipline and watching the scale climb higher and higher, and their bellies growing bigger and bigger.
All of which leads me to conclude that over-enthusiastic wheat consumption is not only one cause of obesity in this country, it is the leading cause of the obesity and diabetes crisis in the United States. It's a big part of the reason that reality shows like the Biggest Loserare never at a loss for contestants. It explains why modern athletes, like baseball players and golfers, are fatter than ever. Blame wheat when you are being crushed in your 2 x 2 airline seat by the 280-pound man occupying the seat next to yours.
Sure, sugary soft drinks and sedentary lifestyles add to the problem. But for the great majority of health conscious people who don't indulge in these obvious poor choices, the principal trigger for weight gain is wheat.
And wheat consumption is about more than just weight. There are also components of modern wheat that lead to diabetes, heart disease, neurologic impairment -- including dementia and incontinence -- and myriad skin conditions that range from acne to gangrene -- all buried in that innocent-looking bagel you had for breakfast.
Despite the potential downside of a diet so laden with wheat products, we continually bombarded with messages to eat more of this grain. The Department of Health and Human Services and the USDA, for instance, through their Dietary Guidelines for Americans, advocate a diet dominated by grains (the widest part of the Food Pyramid, the largest portion of the Food Plate). The American Dietetic Association, American Diabetes Association, American Heart Association, along with the Grain Foods Foundation, the Whole Grains Council, and assorted other agriculture and food industry trade groups all agree: Everyone should eat more healthy whole grains. This includes our children, who are being told to do such things as replace fast food with grains. These agencies were originally sidetracked by the "cut your fat and cholesterol" movement, which led to a wholesale embrace of all things carbohydrate, but especially "healthy whole grains." Unwittingly, they were advising increased consumption of this two-foot tall creation of the geneticists, high-yield semi-dwarf wheat.
This message to eat more "healthy whole grains" has, I believe, crippled Americans, triggering a helpless cycle of satiety and hunger, stimulating appetite by 400 calories per day and substantially contributing to the epidemic of obesity and diabetes. And, oh yes, adding to the double-digit-per-year revenue growth of the diabetes drug industry, not to mention increased revenues for drugs for hypertension, cholesterol, and arthritis.
It is therefore my contention that eliminating all wheat from the diet is a good idea not just for people with gluten sensitivity; it's a smart decision for everybody. I have experience in my heart disease prevention practice, as well as my online program for heart disease prevention and reversal, with several thousand people who have done just that and the results are nothing short of astounding. Weight loss of 30, 50, even 70 pounds or more within the first six months; reversal of diabetes and pre-diabetic conditions; relief from edema, sinus congestion, and asthma; disappearance of acid reflux, irritable bowel syndrome symptoms; increased energy, happier mood, better sleep. People feel better, look better, eat fewer calories, feel less hungry, are able to discontinue use of many medications -- just by eliminating one food from their diet -- ironically a food that they've been told to eat more of.
It is imperative that we break our reliance on wheat. It will require nothing less than an overthrow of conventional nutritional dogma. There will be battles fought to preserve the status quo; the wheat industry and its supporters will scream, yell, and claw to maintain their position, much as the tobacco industry and its lobbyists fought to maintain their hold on consumers.
If the health benefits of a wheat-free diet sound hard to believe, why not conduct your own little experiment and see for yourself: simply eliminate all things made of wheat for four weeks -- no bread, bagels, pizza, pretzels, rolls, donuts, breakfast cereals, pancakes, waffles, pasta, noodles, or processed foods containing wheat (and do be careful to read labels, as food manufacturers love to slip a little wheat gliadin into your food every chance they get to stimulate your appetite). That's a lot to cut out, true, but there's still plenty of real, nutrient-dense foods like vegetables, fruit, nuts, cheese and dairy products, meat, fish, soy foods, legumes, oils like olive oil, avocados, even dark chocolate that you can eat in their place. If after that 4-week period you discover new mental clarity, better sleep, relief from joint pain, happier intestines, and a looser waistband, you will have your answer.
Tuesday, October 25, 2011
Endive and Quinoa Salad With Poached Egg

If you hesitate to buy salad greens that could wilt before you have a chance to use them, endive is a perfect solution. The tight bulbs will keep in your crisper for about a week without deteriorating. Make the dressing and keep what you don’t use in the refrigerator. It will keep until you use it up.
1- 1/2 tablespoons of the following dressing:
2 tablespoons red wine vinegar, Champagne vinegar or sherry vinegar (sherry vinegar is my preference)
1 teaspoon balsamic vinegar (optional)
Salt, preferably coarse sea salt or fleur de sel, to taste
1 teaspoon Dijon mustard
6 tablespoons extra virgin olive oil, or 4 tablespoons olive oil and 2 tablespoons walnut oil
1 garlic clove, crushed
For the salad:
1/2 cup cooked quinoa
1 1/2 endives, preferably a mix of red and green, cut crosswise into 3/4-inch slices
2 white or cremini mushrooms, thinly sliced
1/4 yellow bell pepper, cut crosswise in thin slices
1 teaspoon chopped fresh herbs, like tarragon and chives
1/4 ounce (1 tablespoon) slivered Parmesan
1 egg, poached
1. Make the dressing first so that the garlic, which you’ll pull out before tossing the salad, can marinate. In a bowl or a glass measuring cup, whisk together the vinegars, salt, pepper and mustard. Whisk in the oils and add the garlic, which should be crushed so that it infuses the dressing. Let sit for 15 minutes. Remove the garlic, whisk the dressing and measure out 1 1/2 tablespoons. Transfer the remaining dressing to a jar or a squeeze bottle and refrigerate.
2. Combine the quinoa, endives, mushrooms, yellow pepper, herbs and Parmesan in a salad bowl. Add the 1 1/2 tablespoons dressing and toss together.
3. Poach the egg, if you have not done so already. Top the salad with the poached egg and enjoy.
Yield: 1 main-dish serving or 2 side servings or starters.
Advance preparation: The dressing will keep, without the garlic clove, for at least a week in the refrigerator. Keep it in a squeeze bottle and use as needed. The quinoa will keep for 3 or 4 days in the refrigerator.
Nutritional information per serving (analyzed for 1 egg only): 420 calories; 5 grams saturated fat; 3 grams polyunsaturated fat; 14 grams monounsaturated fat; 192 milligrams cholesterol; 32 grams carbohydrates; 11 grams dietary fiber; 266 milligrams sodium (does not include salt to taste); 18 grams protein
Wednesday, October 12, 2011
Hearty Do-Ahead Autumn Dishes

These vegetarian meals appeal to families that include a mix of meat-eaters and vegetarians.
Recipes for Health: Bulgur and Kale Casserole with Yogurt Topping (October 11, 2011)
Recipes for Health: Mushroom Lasagna(October 12, 2011)
Recipes for Health: Red Bean Stew (October 13, 2011)
Recipes for Health: Mixed Bean and Winter Squash Stew with Fresh Basil (October 14, 2011)
What I’ve come up with is a mix of humble stews (beans and lentils) and more complex casseroles. The lentil and bean dishes dispel the myth that fast food is cheaper than healthy meals prepared at home. A great pot of beans or lentils, even when you add to it a bunch of chard from the farmers’ market, costs no more than $4 to make, and it feeds four to six people.
French Lentils with Chard
This combo of lentils and greens is inspired by a classic preparation for the tasty French Le Puy green lentils that traditionally includes salt pork and/or bacon and sausage. For this vegetarian version, I don’t insist on Le Puy lentils, although I highly recommend them. Meat eaters in the family might want to accompany this with sausage, cooked separately or with the lentils. I recommend topping the lentils with goat cheese or feta.
1 tablespoon extra virgin olive oil
1 onion, chopped
2 carrots, chopped
1 celery stalk, chopped
4 large garlic cloves, minced
1 pound lentils, preferably imported green lentils, washed and picked over (2 1/4 cups)
A bouquet garni made with 2 bay leaves, a Parmesan rind and a sprig or two each of thyme and parsley
Salt and freshly ground pepper
1 bunch Swiss chard (3/4 to 1 pound), stemmed, washed and coarsely chopped
Freshly grated Parmesan, crumbled goat cheese or feta for serving
1. Heat the olive oil over medium-high heat in a heavy soup pot or Dutch oven. Add the onion and cook, stirring, until it begins to soften, about 3 to 5 minutes. Add the carrot and celery and cook, stirring, until all the vegetables are tender, about 5 minutes. Add the garlic and continue to cook, stirring, until fragrant, 30 seconds to a minute. Add the lentils, 2 quarts water and bouquet garni. Bring to a boil, reduce the heat, and simmer 40 minutes. Add salt and pepper to taste. Remove the bouquet garni.
2. Stir the chard into the simmering lentils. Cook another 10 minutes or so, until the lentils and greens are tender. The chard should be tender but still bright. Taste, adjust seasonings and serve, passing the cheese at the table for sprinkling. Alternatively, transfer to an oiled baking dish, top with rounds of goat cheese, crumbled feta or grated Parmesan, and heat through in a medium oven.
Yield: Serves 4 to 6
Advance preparation: You can cook the lentils through Step 1 and keep in the refrigerator for 2 or 3 days. Bring back to a simmer and proceed with the recipe. The finished dish will keep for 2 or 3 days in the refrigerator, but the color of the chard will fade.
Nutritional information per serving (4 servings): 462 calories; 1 gram saturated fat; 0 grams polyunsaturated fat; 3 grams monounsaturated fat; 0 milligrams cholesterol; 80 grams carbohydrates; 21 grams dietary fiber; 221 milligrams sodium (does not include salt to taste); 28 grams protein
Friday, September 30, 2011
The Last of the Fresh Greens

Depending on how far north you live, in September and early October farmers’ markets may still offer a great mix of vegetables that includes the last of the produce we associate with summer -- eggplant, peppers, summer squash, tomatoes -- and a wide selection of greens that will continue well into winter. This week I’ll offer a few ideas for entrees made with some of my favorites: Swiss chard, broccoli rabe, beet greens and bok choy, among others.
One nutritional note about Swiss chard: It’s naturally high in sodium. As a result, you’ll see high sodium values in some of this week’s recipes. If sodium is an issue for you, select other greens (spinach is also high in sodium, however) for the recipe. If you can’t get to a farmers’ market, try the prewashed, stemmed Southern Greens mix available in most supermarkets.
Macaroni With Tomato Sauce, Chard and Goat Cheese
This tomatoey version of macaroni and cheese is a great way to use greens or other vegetables.
2 cups tomato sauce, made with fresh or canned tomatoes
Salt
1 pound Swiss chard (or other greens), stemmed and washed
12 ounces penne rigata
3 ounces soft, mild goat cheese (about 3/4 cup)
1 1/2 ounces (about 1/3 cup) freshly grated Parmesan
Freshly ground pepper
1 tablespoon extra virgin olive oil
1. Begin heating a large pot of water for the chard and pasta. Meanwhile, make the tomato sauce. When it’s done, transfer to a large bowl, and stir in the goat cheese.
2. Preheat the oven to 350 degrees, and oil a 2-quart baking dish or gratin with olive oil.
3. Fill a bowl with ice water. When the water in the pot comes to a boil, salt generously and add the Swiss chard. Blanch for one to two minutes, then transfer to the ice water and drain. Squeeze out excess water, and chop fine. Add to the bowl with the tomato sauce. Taste and season with salt and pepper. (Alternatively, you can steam the greens, but you’ll need the water for the pasta in any case.)
4. Bring the water back to a boil, and add the pasta. Cook the pasta for a minute less than the instructions on the package indicate. It should still be a little underdone, as it will finish cooking in the oven. Drain, and transfer to the bowl with the tomato sauce and chard. Add 1/4 cup of the Parmesan, and stir together until the pasta is thoroughly coated with the sauce. Transfer to the baking dish. Sprinkle the remaining Parmesan over the top, and drizzle on the olive oil.
5. Bake in the preheated oven until the casserole is bubbly and the top just beginning to color, about 30 minutes. Remove from the heat, and let stand for 5 to 10 minutes before serving.
Yield: Serves four to six.
Advance preparation: You can make the tomato sauce up to three days ahead of serving. Keep it in the refrigerator, and reheat before proceeding with the recipe. The blanched chard will keep for three or four days in the refrigerator. The assembled macaroni will keep for several hours outside the refrigerator, and can be covered and refrigerated for up to two days before baking (the pasta will become quite soft)
.
Eggplant, Bulgur and Tomato Casserole with Yogurt Topping

This is a vegetarian moussaka, with bulgur standing in for meat. The tangy Balkan-style yogurt and egg topping has a wonderful pillowy texture, much lighter than béchamel. I like to begin this dish by making the tomato sauce, which I often prepare a day ahead.
1 tablespoon extra virgin olive oil
1 small or 1/2 medium onion, chopped
2 to 4 garlic cloves (to taste)
2 pounds fresh tomatoes, quartered if you have a food mill; peeled, seeded and chopped if you don’t; or 1 (28-ounce) can chopped tomatoes in juice or crushed tomatoes in purée
Salt and freshly ground pepper
1/2 teaspoon sugar
1/4 teaspoon ground cinnamon
1/2 teaspoon sweet paprika
1/4 teaspoon ground allspice
For the gratin:
1 large eggplant (1 1/2 to 1 3/4 pounds)
1 cup coarse bulgur (No. 3)
Extra virgin olive oil (1 to 2 tablespoons)
Salt and freshly ground pepper
3 eggs
1 cup thick Greek-style or drained yogurt
Salt, pepper and paprika to taste
2 ounces (about 1/2 cup) freshly grated Parmesan
1. Heat the olive oil in a large, heavy skillet over medium heat and add the onion. Cook, stirring, until onion is tender, about 5 minutes, and add the garlic. Cook, stirring, until fragrant, about a minute, and add the tomatoes, salt to taste, pepper, sugar, cinnamon, paprika and allspice. Turn the heat up to medium-high and cook until the tomatoes are bubbling. Stir together, turn the heat back to medium-low, partly cover and cook, stirring often, until the tomatoes have cooked down and the sauce is thick and fragrant, 25 to 30 minutes. Taste and adjust seasoning. Remove from the heat. If your sauce is chunky, either put it through a food mill or pulse it in a food processor fitted with the steel blade. Set aside.
2. Preheat the oven to 450 degrees Fahrenheit. Cut the eggplant in lengthwise slices. Sprinkle slices with salt and let sit for 15 to 30 minutes (this step is optional). Meanwhile, cook the bulgur. Bring 2 cups water with salt to taste to a boil in a medium saucepan. Add the bulgur, and when the water comes back to a boil, reduce the heat to low, cover and simmer 15 to 20 minutes, until all of the water has been absorbed. Remove from the heat, place a clean dish towel over the pan and cover with the lid. Let the bulgur sit while you roast the eggplant.
3. Rinse the eggplant slices and pat dry. Line baking sheets with foil and brush the foil with olive oil. Lay the eggplant slices on the foil, brush lightly with oil and place in the hot oven. Roast for 15 to 20 minutes, until eggplant is beginning to brown, switching the baking sheets halfway through. Remove from the oven and fold the aluminum up over the eggplant slices so that they continue to steam and soften in the foil envelope as they cool completely. They should be thoroughly tender by the time they cool. Turn the oven down to 350 degrees Fahrenheit.
4. Oil a 3-quart baking dish. Spread a small amount of tomato sauce on the bottom, and spoon in half of the bulgur in an even layer. Cover the bulgur with eggplant slices and spread about half the remaining tomato sauce over the eggplant. Sprinkle 2 tablespoons of Parmesan over the tomato sauce. Repeat the layers, but don’t sprinkle on another 2 tablespoons of Parmesan. If you have extra eggplant slices, make a top layer of them, on top of the tomato sauce.
5. Beat together the eggs, yogurt and 2 tablespoons of the remaining Parmesan. Season with salt, pepper and paprika. Spoon over the top in an even layer and sprinkle with the remaining Parmesan. Place in the oven and bake 30 to 40 minutes, until golden. Remove from the heat and let sit for 10 minutes or longer before serving.
Yield: Serves 6 to 8
Advance preparation: All of the elements of this casserole will keep for 2 to 3 days in the refrigerator, as will the assembled casserole, without the egg-yogurt topping. Make the topping right before baking. The casserole can be baked ahead and reheated in a low oven.
Yogurt: Much More Than a ‘Health Food’

There’s no question that yogurt is good for you. But the marketing hype that has built its reputation as a “health food” does injustice to several facts. One is that many other foods that are every bit as beneficial, like greens, don’t enjoy the same degree of public acclaim. Another is that yogurt has been sustaining people all around the world since long before the dawn of advertising.
In countries where yogurt is part of the culinary landscape, it’s used in many savory dishes. I love the way it contrasts with spicy foods in India and is served, spiked with pungent garlic, as a cool topping with many hot dishes in Turkey and the Middle East.
To thicken yogurt, simply put it into a cheesecloth-lined strainer set over a bowl and refrigerate for several hours. Or buy already thick Greek yogurt or lebna in Middle Eastern markets. But whatever you do, buy organic yogurt that has only two ingredients on the label: milk and live active cultures. I used plain low-fat (not nonfat) yogurt in this week’s recipes; full-fat yogurt will work too, but nonfat is too watery and often quite sour.
Grilled Albacore With Yogurt-Dill Sauce on a Bed of Arugula
This is based on a recipe for red mullet from “Classic Turkish Cooking” by Ghillie Basan. Red mullet isn’t so easy to come by in the United States, and albacore works well here. In the authentic Turkish dish, the red mullet is marinated in a mixture of onion juice and lemon juice with bay leaf. This step is optional; it tenderizes the fish and adds terrific flavor, but grilled albacore is nice enough on its own. Dill is the traditional herb for this recipe, but mint is very nice as well.
Optional marinade:
2 large onions
Salt to taste
2 tablespoons fresh lemon juice
2 tablespoons extra virgin olive oil
4 bay leaves, broken up
For the fish:
4 albacore steaks, about 6 ounces each
Salt and freshly ground pepper
2 tablespoons extra virgin olive oil (omit if the fish has been marinated)
For serving:
2 garlic cloves, halved, green shoots removed
Generous pinch of salt
1/2 cup thick Greek-style or drained yogurt
2 tablespoons fresh lemon juice
2 to 4 tablespoons finely chopped dill or mint
Salt and freshly ground pepper
1 bag baby arugula, preferably the wild variety
1. If marinating the fish: Quarter the onions and place in a food processor fitted with the steel blade. Add a generous pinch of salt and pulse the onions until puréed and watery. Line a strainer with a double thickness of cheesecloth and dump in the puréed onions. Take up the edges of the cheesecloth and squeeze out the onion juice (you can also use a cloth kitchen towel for this). Discard the pulp. Add to the onion juice the lemon juice, olive oil and bay leaves. Place the fish steaks in the marinade, turn over a few times, cover the bowl and refrigerate for 1 to 2 hours, basting or turning the fish from time to time.
2. Heat a hot charcoal or gas grill, or a grill pan or cast-iron skillet over medium-high heat. If you have not marinated the fish, simply salt and pepper and brush with olive oil. Combine the yogurt, garlic and lemon juice in a bowl. Season to taste with salt and pepper and stir in the dill or mint. Set aside.
3. Arrange the arugula on a large serving platter.
4. Grill the fish on each side for 2 to 4 minutes, depending on how rare you like it. Brush the unturned side with marinade (or just olive oil) before turning it over. Transfer the fish to the platter, placing the steaks on top of the arugula. Spoon the yogurt sauce over the fish and arugula, and serve.
Yield: Serves 4
Advance preparation: You can make both the marinade and the yogurt sauce several hours ahead of time. They become more pungent as they sit.
Tuesday, September 20, 2011
Fall Season Greens
Depending on how far north you live, in September and early October farmers’ markets may still offer a great mix of vegetables that includes the last of the produce we associate with summer -- eggplant, peppers, summer squash, tomatoes -- and a wide selection of greens that will continue well into winter.
Macaroni With Tomato Sauce, Chard and Goat Cheese
This tomatoey version of macaroni and cheese is a great way to use greens or other vegetables.
2 cups tomato sauce, made with fresh or canned tomatoes
Salt
1 pound Swiss chard (or other greens), stemmed and washed
12 ounces penne rigata
3 ounces soft, mild goat cheese (about 3/4 cup)
1 1/2 ounces (about 1/3 cup) freshly grated Parmesan
Freshly ground pepper
1 tablespoon extra virgin olive oil
1. Begin heating a large pot of water for the chard and pasta. Meanwhile, make the tomato sauce. When it’s done, transfer to a large bowl, and stir in the goat cheese.
2. Preheat the oven to 350 degrees, and oil a 2-quart baking dish or gratin with olive oil.
3. Fill a bowl with ice water. When the water in the pot comes to a boil, salt generously and add the Swiss chard. Blanch for one to two minutes, then transfer to the ice water and drain. Squeeze out excess water, and chop fine. Add to the bowl with the tomato sauce. Taste and season with salt and pepper. (Alternatively, you can steam the greens, but you’ll need the water for the pasta in any case.)
4. Bring the water back to a boil, and add the pasta. Cook the pasta for a minute less than the instructions on the package indicate. It should still be a little underdone, as it will finish cooking in the oven. Drain, and transfer to the bowl with the tomato sauce and chard. Add 1/4 cup of the Parmesan, and stir together until the pasta is thoroughly coated with the sauce. Transfer to the baking dish. Sprinkle the remaining Parmesan over the top, and drizzle on the olive oil.
5. Bake in the preheated oven until the casserole is bubbly and the top just beginning to color, about 30 minutes. Remove from the heat, and let stand for 5 to 10 minutes before serving.
Yield: Serves four to six.
Advance preparation: You can make the tomato sauce up to three days ahead of serving. Keep it in the refrigerator, and reheat before proceeding with the recipe. The blanched chard will keep for three or four days in the refrigerator. The assembled macaroni will keep for several hours outside the refrigerator, and can be covered and refrigerated for up to two days before baking (the pasta will become quite soft).
Nutritional information per serving (four servings): 547 calories; 6 grams saturated fat; 2 grams polyunsaturated fat; 7 grams monounsaturated fat; 19 milligrams cholesterol; 80 gramscarbohydrates; 7 grams dietary fiber; 503 milligrams sodium (does not include salt to taste); 24 grams protein
Wednesday, August 31, 2011
Stuffed Yellow Peppers With Israeli Couscous and Pesto

The large spherical couscous that we know as Israeli couscous actually has its origins in North Africa, where it is called muhamma. In Middle Eastern markets, you may find it labeled maghribiyya.
5 tablespoons extra virgin olive oil
1 cup Israeli couscous
Salt to taste
1 large garlic clove (more to taste)
1 cup fresh basil leaves
1/4 cup freshly grated Parmesan
3 large yellow peppers, cut in half lengthwise and seeded
2 cups tomato purée or homemade tomato sauce
Freshly ground pepper to taste
Fresh basil leaves for garnish
1. Heat one tablespoon of the olive oil over medium-high heat in a medium saucepan. Add the couscous. Stir until the couscous begins to color and smell toasty. Add 2 cups water and salt to taste. Bring to a boil. Reduce the heat, cover and simmer 15 minutes or until the couscous is tender. Drain.
2. Turn on a blender or a food processor fitted with the steel blade. Drop in the garlic. When it is chopped and adhering to the sides of the blender jar or food processor bowl, stop the machine and scrape down the sides. Add the basil leaves and salt to taste. Turn on the machine, and add the remaining olive oil. Process until smooth. Add the cheese, and blend until incorporated.
3. Preheat the oven to 350 degrees. Oil a lidded casserole large enough to accommodate all of the peppers. Combine the couscous and pesto. Stir together. Taste and adjust seasonings, adding salt and pepper to taste. Fill the halved peppers with this mixture, and arrange in the casserole. Pour the tomato sauce or purée into the dish. Cover and bake 45 minutes to an hour until the peppers are soft but still hold their shape. Remove from the heat, and serve hot or at room temperature, with some of the tomato sauce spooned over the top. Garnish with basil leaves.
Yield: Serves six.
Advance preparation: The cooked couscous will keep for three or four days in the refrigerator. The peppers can be made a day ahead and reheated or served at room temperature.
Nutritional information per serving: 281 calories; 2 grams saturated fat; 1 gram polyunsaturated fat; 9 grams monounsaturated fat; 3 milligrams cholesterol; 36 grams carbohydrates; 4 grams dietary fiber; 80 milligrams sodium (does not include salt to taste); 8 grams protein
Friday, August 26, 2011
Simple Vegetable Paella

You don’t have to make this vegetable-rich dish in a paella pan, though if you do, you’ll get a nice layer of crusty rice on the bottom. Serve it as a main dish or as a side.
1 quart chicken stock, vegetable stock or garlic broth
Generous pinch (about 1/2 teaspoon) saffron threads
2 tablespoons extra virgin olive oil
1 medium onion, finely chopped
4 large garlic cloves, minced
1 red pepper, cut into strips
1 green pepper, cut into strips
2 cups medium-grain rice
1 tablespoon tomato paste
1 teaspoon sweet paprika
1 pound ripe tomatoes, seeded and grated on the large holes of a box grater; or peeled, seeded and chopped; or 1 14-ounce can chopped tomatoes with juice
1/4 pound green beans, trimmed and cut in 1-inch lengths
2 or 3 baby artichokes, trimmed and sliced (may also use frozen artichoke hearts, sliced)
1 can chickpeas, drained and rinsed, or 1 1/2 cups fresh or thawed frozen lima beans
1 cup shelled fresh or thawed frozen peas
Salt and freshly ground pepper
1. Bring the stock to a simmer in a medium saucepan. Crush the saffron threads between your fingertips, and place in a small bowl. Add 1 tablespoon warm water, and set aside.
2. Heat the oil over medium heat in a large, heavy frying pan, an earthenware casserole (cazuela) set over a flame tamer, or a paella pan. Add the onion. Cook, stirring, until the onion is tender, about five minutes. Add the garlic, peppers and a generous pinch of salt. Cook, stirring, until the peppers begin to soften, about three minutes. Add the tomato paste, paprika and rice. Cook, stirring, for one minute until the grains begin to crackle. Add the tomatoes and cook, stirring, until they cook down slightly and smell fragrant, about five minutes. Stir in the saffron with its soaking water, scraping in every last bit with a rubber spatula. Season generously with salt and pepper.
3. Add the stock, green beans, artichokes and chickpeas or lima beans. Bring to a boil. Stir once, reduce the heat to medium-low, and simmer without stirring until the liquid has just about evaporated, about 10 to 15 minutes. Add the peas. Continue to simmer until the rice is dry, another 5 to 10 minutes. Remove from the heat and serve.
Yield: Serves six to eight.
Advance preparation: This does not have to be piping hot, so it can be made an hour before you wish to serve. If you make it further ahead than that, you can reheat it in the pan.
Nutritional information per serving (six servings): 432 calories; 1 gram saturated fat; 1 gram polyunsaturated fat; 4 grams monounsaturated fat; 0 milligrams cholesterol; 81 gramscarbohydrates; 8 grams dietary fiber; 261 milligrams sodium (does not include salt to taste); 13 grams protein
Lentil and Bulgur Pilaf

1/4 cup red lentils
1 small onion
3/4 cup brown lentils
3 garlic cloves, 1 crushed, the other 2 minced
Salt to taste
1 cup coarse bulgur
2 tablespoons extra virgin olive oil
1 teaspoon cumin seeds, lightly toasted and coarsely ground
1/4 cup finely chopped flat-leaf parsley, or a mixture of parsley and dill
2 tablespoons finely chopped fresh mint
Juice of 1 lemon (to taste)
1. Place the red lentils in a bowl, and cover with cold water. Soak for up to two hours or overnight in the refrigerator. Drain. The lentils should taste fresh, with a pleasant crunchy texture.
2. Cut the onion in half. Finely chop one half, and set aside. Combine the other half, intact, with the brown lentils and crushed garlic clove in a heavy saucepan. Add the bay leaf and 3 cups water. Bring to a boil, add salt to taste, reduce the heat, cover and simmer 30 to 35 minutes or until the lentils are tender but still intact. Taste and adjust seasoning. Remove the onion, garlic clove and bay leaf.
3. Place the bulgur in a 2-quart bowl. Place a strainer over the bowl, and drain the lentils so that the hot broth covers the bulgur. Add enough water to cover the bulgur by 1/2 inch. Cover the bowl, and allow the bulgur to sit until fluffy, about 20 to 30 minutes. Strain and press out excess liquid.
4. Heat 1 tablespoon of the oil over medium heat in a large, heavy skillet. Add the minced onion. Cook, stirring, until tender, about five minutes. Stir in the garlic and cumin, and continue to cook until fragrant, 30 seconds to a minute. Stir in the bulgur and the brown and red lentils. Add the herbs and the remaining tablespoon of olive oil, and toss together. Remove from the heat, add lemon juice and pepper, taste and adjust salt. Serve hot or room temperature.
Yield: Serves six.
Advance preparation: You can make the pilaf hours ahead of serving, but do not add the herbs. Reheat in a microwave or in a nonstick skillet over medium heat, then stir in the herbs and serve.
Nutritional information per serving: 248 calories; 1 gram saturated fat; 1 gram polyunsaturated fat; 3 grams monounsaturated fat; 0 milligrams cholesterol; 40 grams carbohydrates; 10 grams dietary fiber; 11 milligrams sodium (does not include salt to taste); 12 grams protein
Subscribe to:
Comments (Atom)